
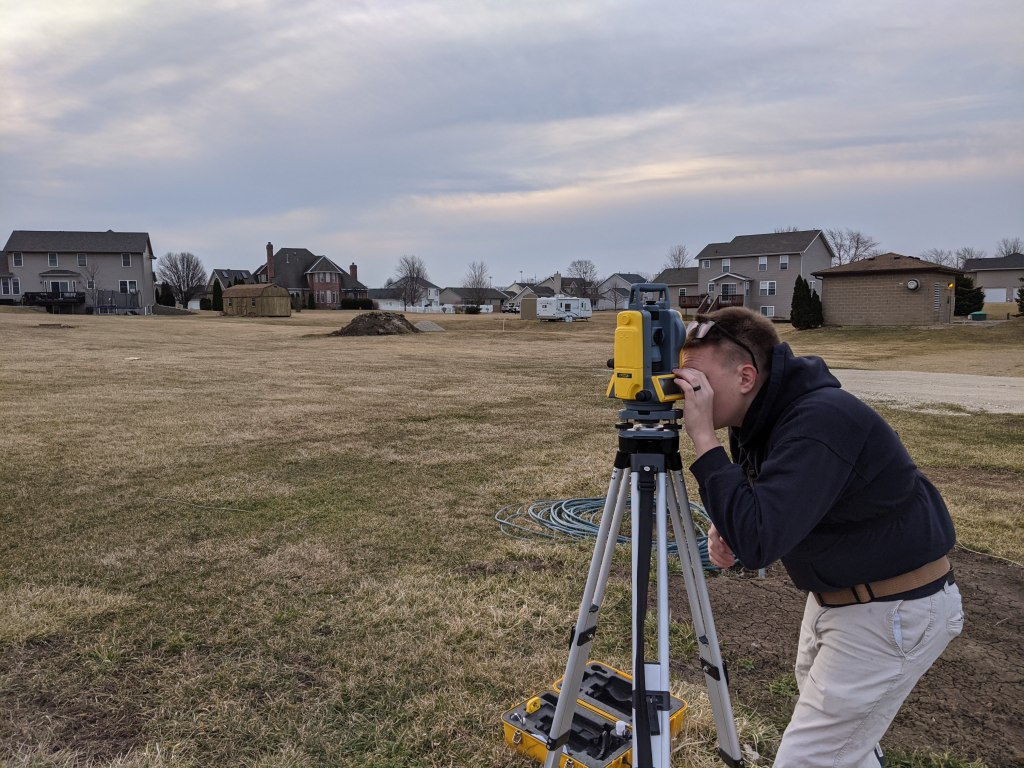
A digital theodolite is an instrument with a complex name, but a simple function. It measures angles.
WHAT IS A THEODOLITE?
The theodolite consists of a tripod mount, and optical site for setting the instrument directly over a known point. You can then sight down the telescope at another known point, zero the instruments (OSET), and then site a new point. This is useful in surveying, or when you are trying to square up a building. What makes the theodolite unique is its extreme precision.
We searched eBay to find a used theodolite. Here is a link to the same model we purchased.
If you remember back to high school geometry, angles are measured in degrees; however, a whole degree really is a large angle. In each degree, there are 60 minutes, and in each minute, there are 60 seconds for a total of 1,296,000 seconds per revolution. An angle is typically reported as degrees-minutes-seconds (eg. 36°12’52”). The theodolite is accurate to about 2″ of angle.
To appreciate just how accurate 2″ is, you have to imagine a triangle, ABC. You’re at Point A and sighting point B. Angle a is the 2″ error in angle measurement and corresponds to an error in linear distance of BC. The length AB represents your distance from the target you are trying to measure.
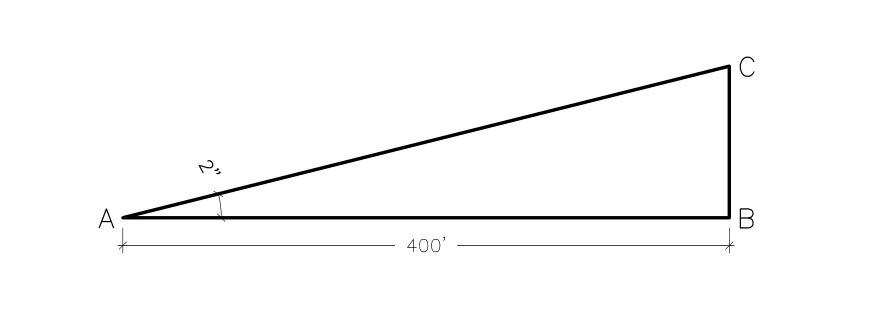
To make the example concrete, assume you are trying to place a pin that is 400′ away from you. With a 2″ arc error, you can position the pin within 1/32″!
BC = 400′ x tan (00°00’02”) = 0.0039′ or 1/32″
That’s accurate!
HOW TO SET UP A THEODOLITE
Setting up a theodolite can seem a little complex due to the precision involved; however, after a few practice runs the process is easy enough to nail down. The goal is to (1) get the instrument directly over your point of interest (e.g. a survey pin, or a building corner), (2) get the instrument perfectly level (e.g. within 3″ of perfect level), and (3) get the instrument zeroed on a known point.
The steps may seem counter-intuitive and somewhat arbitrary, but you really just have to follow them like a recipe. I thought I new better, and it led to a lot of frustration the first couple trips out to the house pad!
STEP 1: set the tripod up roughly level and roughly over you point of interest. Sometimes hanging a plumb bob from the hook on the tripod can help, but you only need to be in the neighborhood of correct. You’ll improve the positioning in the next few steps.
STEP 2: take the theodolite out of the case, and screw it onto the tripod. Take a moment to put all the knobs back in their neutral position—it should be indicated by a groove on each knob. This prevents frustration when you try to adjust a knob too far, and run out of adjustment travel.
STEP 3: sight through the reticule and attempt to locate your point of interest. Often I find myself moving the tip of my shoe around under the tripod to get orientated.
STEP 4: adjust the three leveling screws on the base of the theodolite until you get the reticule directly over your point of interest. You are not trying to get the theodolite level here, you are just trying to get the optical axis of the instrument pointed at your point of interest. If you run out of travel on your leveling screws, you’ll need to start over at step 1 and try to place the tripod more accurately.
STEP 5: now attempt to level the instrument. Look at the rough circular bubble level, and adjust the length of the feet of the tripod to get the bubble on level. Only adjust two feet, or you’ll end up moving your theodolite off position!
STEP 6: perform a fine level. Turn and lock the theodolite so that the two red alignment dots line up. Adjust both of the rear levels screws equally inward or outward to get the fine level on target. Unlock the instrument, turn 90° horizontally, and level the bubble again using the leveling screw you haven’t touched yet. You’ll need to repeat step 6 a few times until the instrument is level.
Now your theodolite should be precisely level, and roughly over the point of interest.
STEP 7: partially unscrew the theodolite from the tripod without moving it. Sight your point of interest through the reticule. You should be close to your point of interest, but probably not exactly on it. Now slide the base of the theodolite on the tripod (without rotating it at all!) until the crosshairs are precisely over the point of interest. If you rotated the instrument, you’ll find yourself needing to go back to step 6.
STEP 8: Repeat the fine leveling procedure from STEP 6. Check that your reticule is still over the point of interest. If both check out, you’re ready to actually use the instrument to measure angles.
STEP 9: Turn on the instrument by holding the ON / OFF button for a second or so. You’ll need to unlock the vertical rotation of the telescope and flip (i.e. transit) the telescope one turn to get the warning to go away.
STEP 10: Unlock the vertical and horizontal rotation knobs and point your telescope at the second point of interest. You can use the small cross hairs at the top to roughly position the telescope before you look through the lens. It helps to keep both eyes open at this stage. Once you’re close, look through the scope and lock the horizontal and vertical rotation knobs.
STEP 10B: You may need to focus the telescope. The large ring on the telescope focuses what you’re looking at and the small ring nearest to you will bring the reticule of the telescope into focus. If you wear glasses and are surveying with someone who doesn’t, you’ll find constantly re-focusing the reticule frustrating 🙂
STEP 11: Use the fine horizontal and vertical rotation knobs to get the reticule of your telescope directly over your second point of interest. Once you’re on it, press the “OSET” button to zero the horizontal angle.
STEP 12 (optional): You can press the “HR / HL” button to change the measurement direction mode of your instrument. This is helpful if you want to angle to increase as you move the instrument to the left (horizonal left angle / HL) or the right (horizontal right angle / HR).
STEP 13: Unlock the horizontal rotation knob and turn your instrument to the desired angle—often this will be 90°00’00”. Once you’re close, lock the horizontal knob and use the fine adjustment. Even a slight breeze will change your reading—the instrument is beyond that precise—so most surveyors shoot for within 5″ depending on your need.
You can now sight through the scope and adjust the vertical angle as needed for viewing. Often, I am trying to place a reference nail on a batter board at a 90°. I’ll have my wife look through the scope while I’m at the batter board with the nail, and have her give me “left a little / right a little” hand signals to help me precisely position the nail.
That’s really all there is to it!

One thought on “Building Layout with a Theodolite”